This page describes how to complete Issues (submit changes). Right now we have a beginner-friendly instructions. As you get more comfortable, you can explore some of git’s faster ways of working, but the below process should work fine for most folks. (Emil mostly uses this process anyways!).
I also have a video here where I screen-share myself doing this process!
Beginner-friendly process!
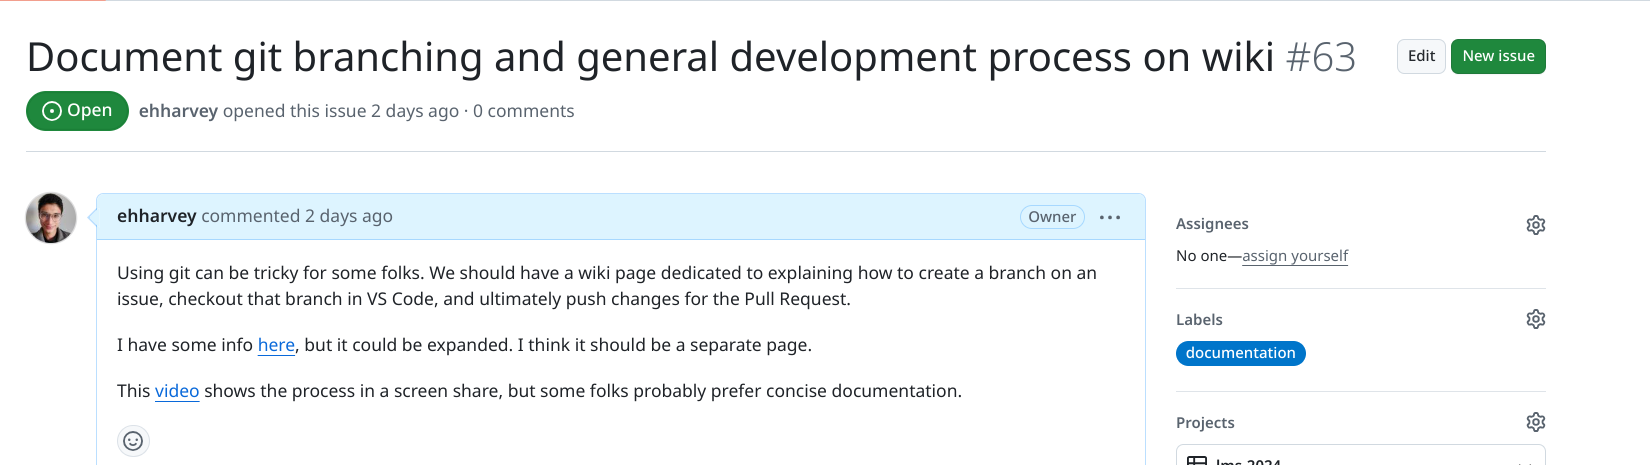
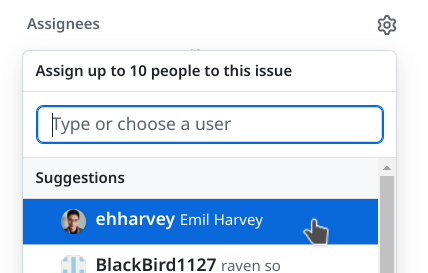
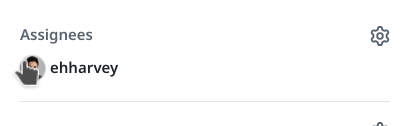
- Find an issue assigned to you
- You can assign yourself Issues that aren’t assigned to anyone. Ideally, Mondays and Tuesdays are the days to look over the work and assign yourself to work.
- Some issues will automatically be assigned to you
- e.g.,
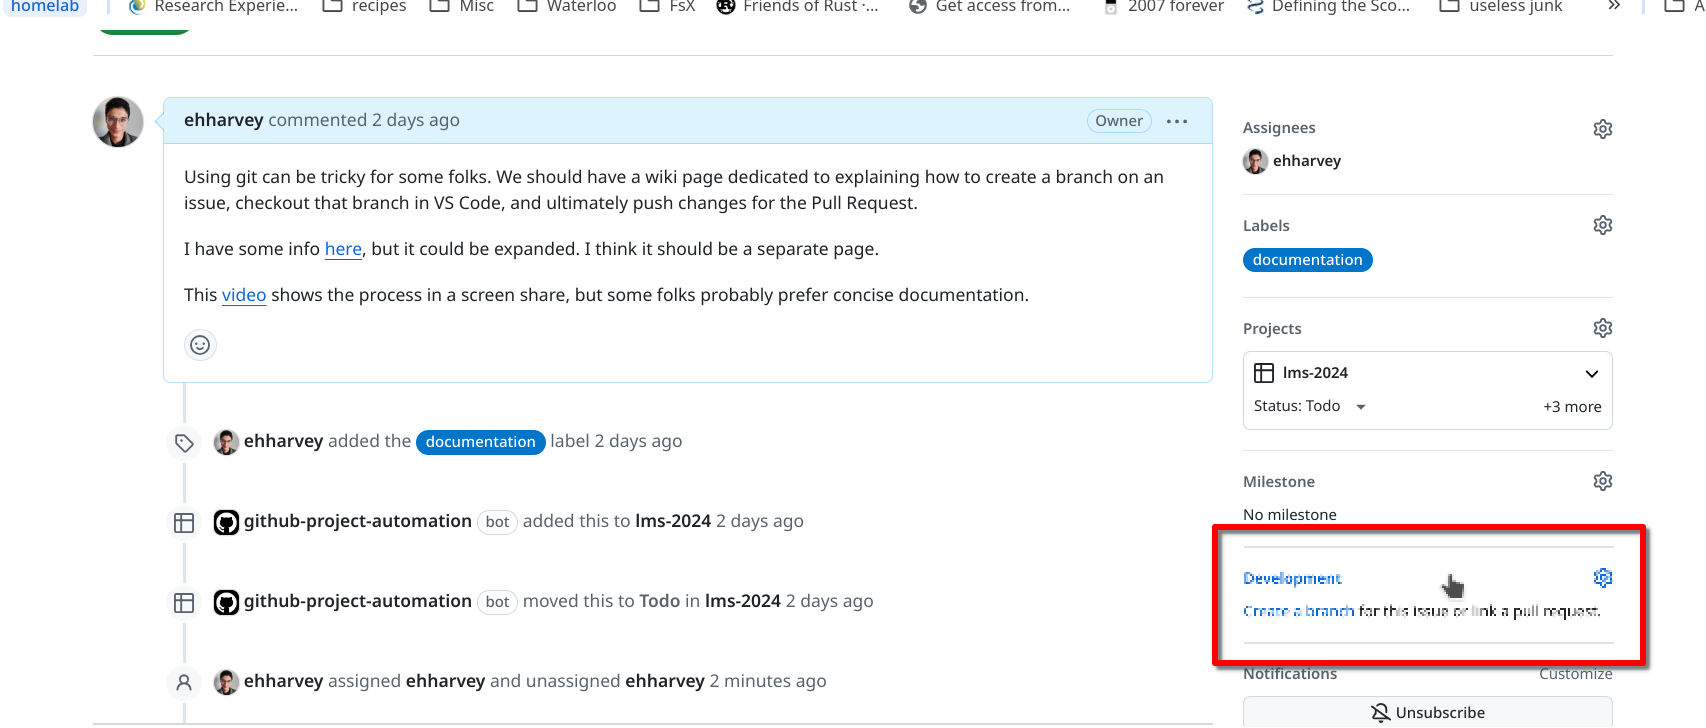
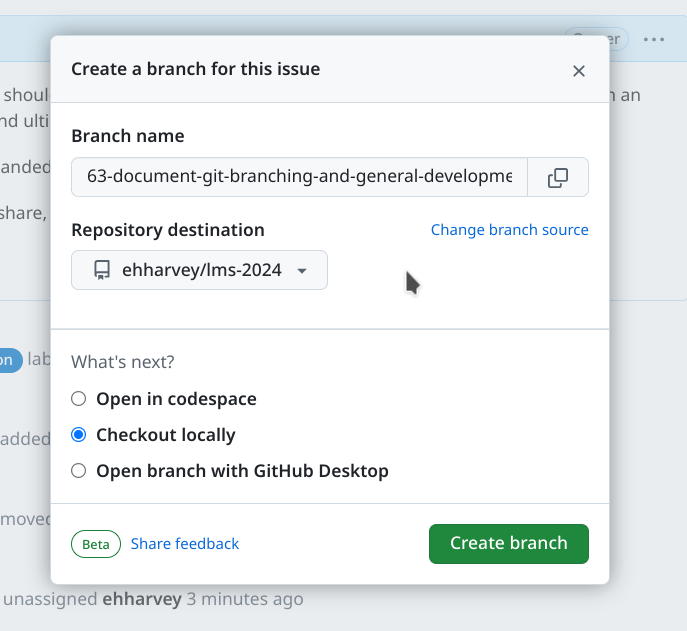
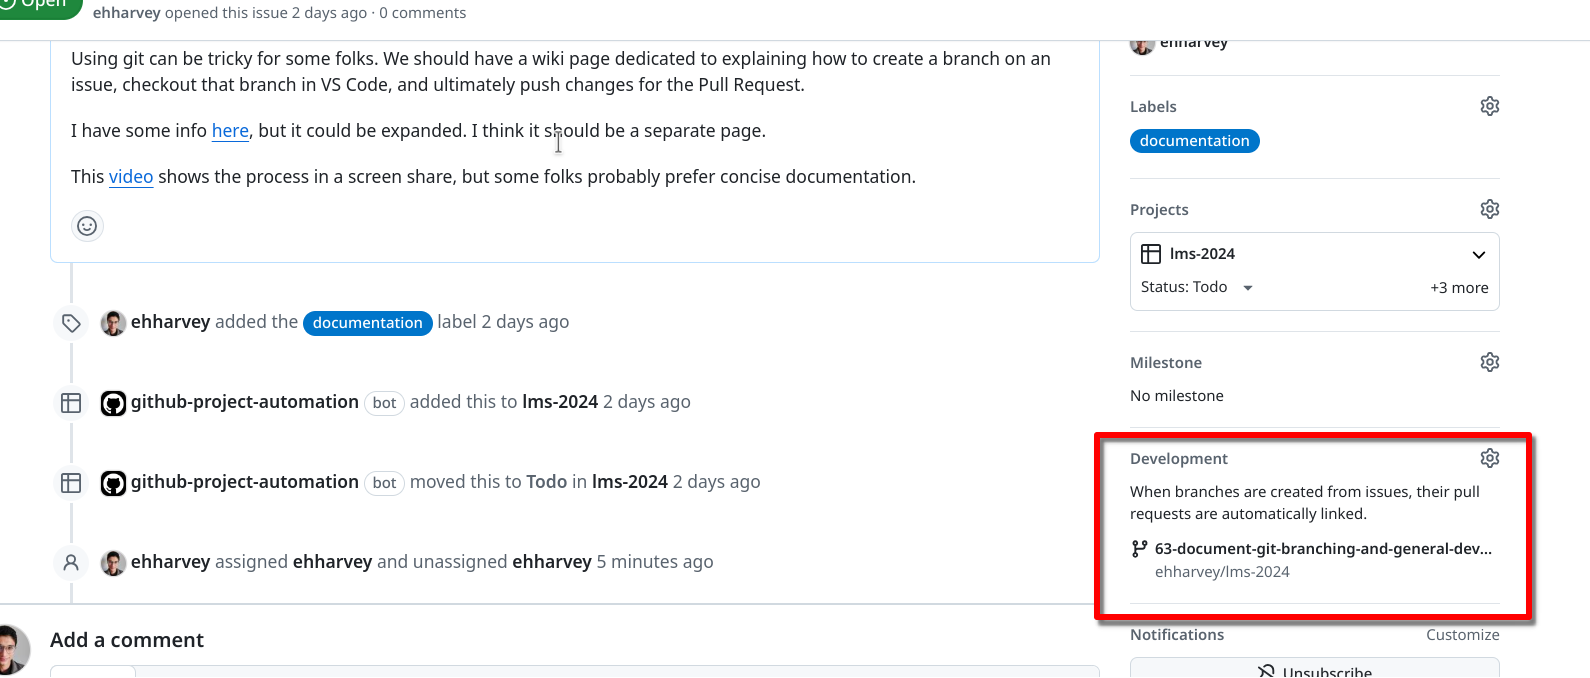
- On the right side, select “Create a branch”
- e.g.,
- e.g.,
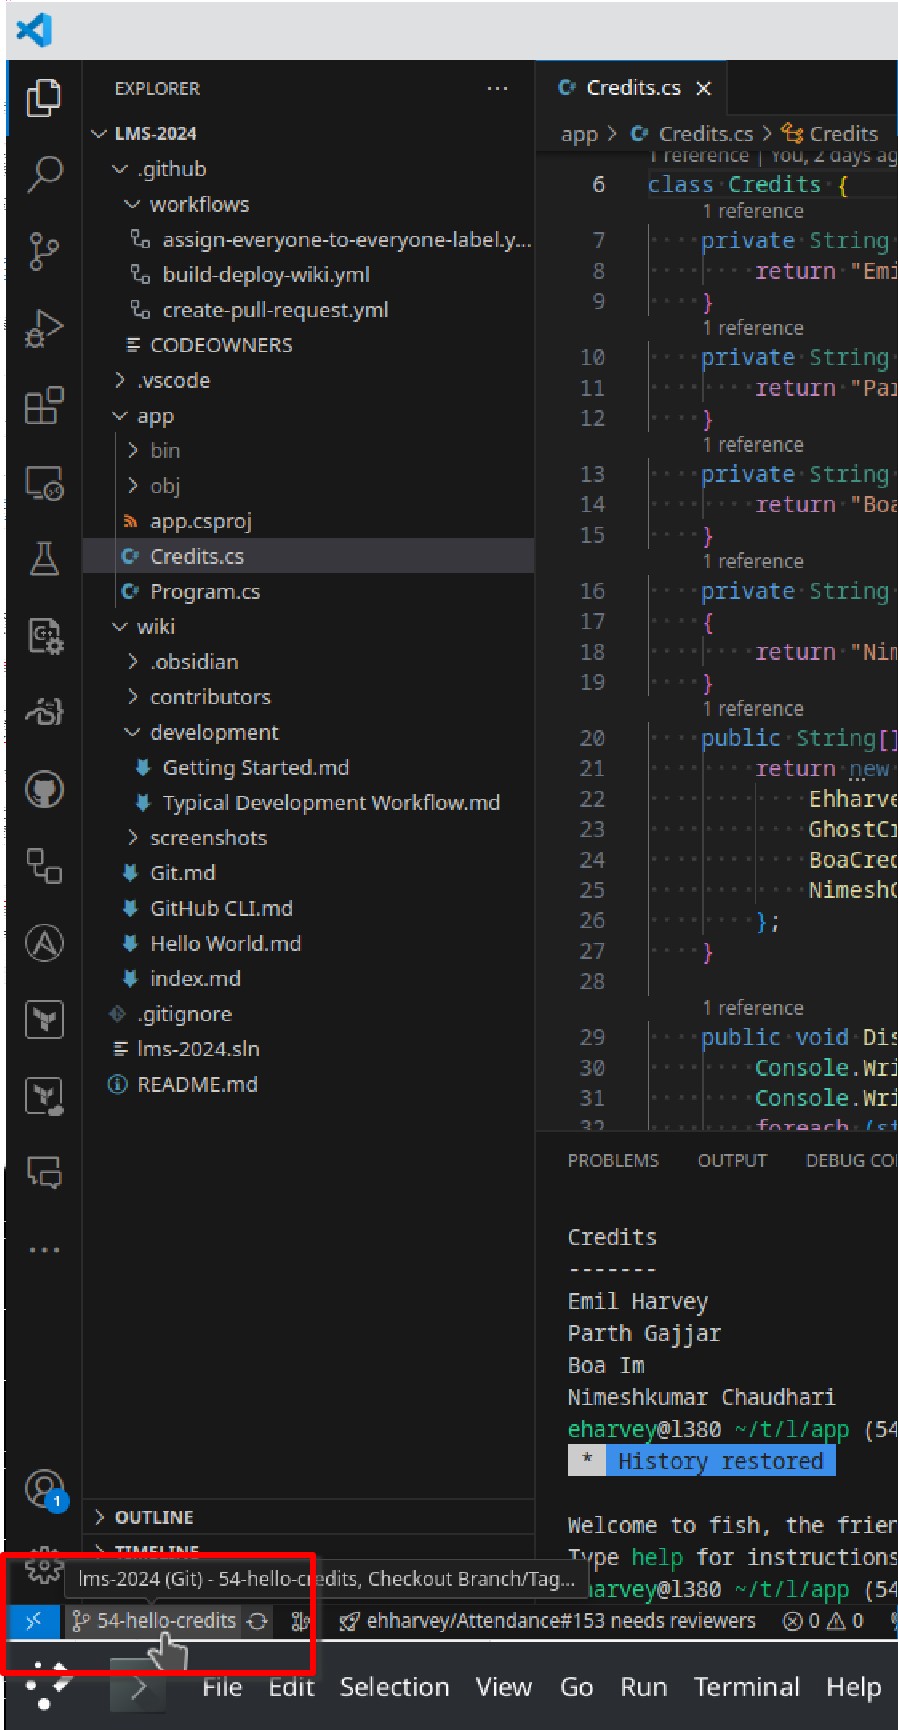
- Now that your branch has been created, open up VS Code and switch to the branch there
- You want to first make sure you are on the main branch
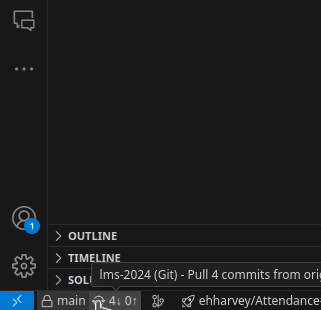
- Then you want to make sure your branch is up to date. You can do so by clicking the refresh button

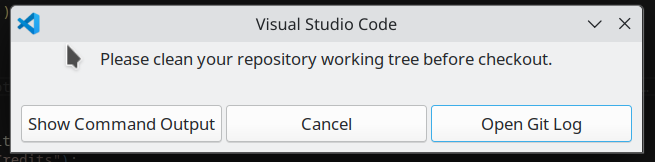
- You might get an error about cleaning your “working tree”. You will see this if you have some changes that haven’t been committed
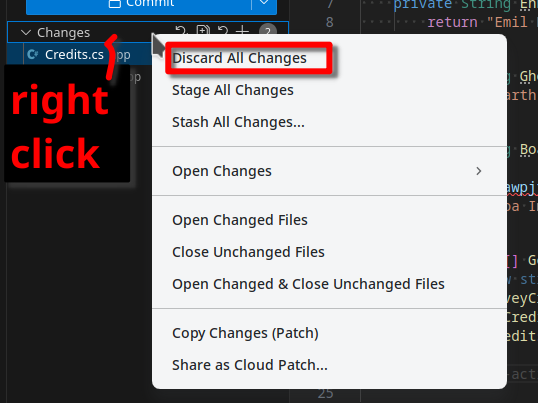
- You can resolve this by going to the changes tab
 (note the
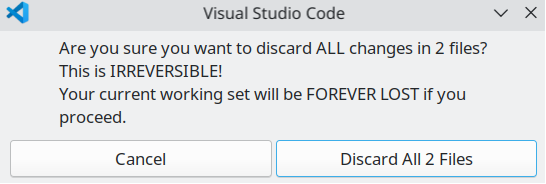
 2). From there you can discard changes by right clicking theChangesdrop down - Note that this will delete all of your changes. You can also commit these changes to a non-main branch. Advanced usage also has this idea of a
stash, but you don’t need to learn that right now!
- You might get an error about cleaning your “working tree”. You will see this if you have some changes that haven’t been committed
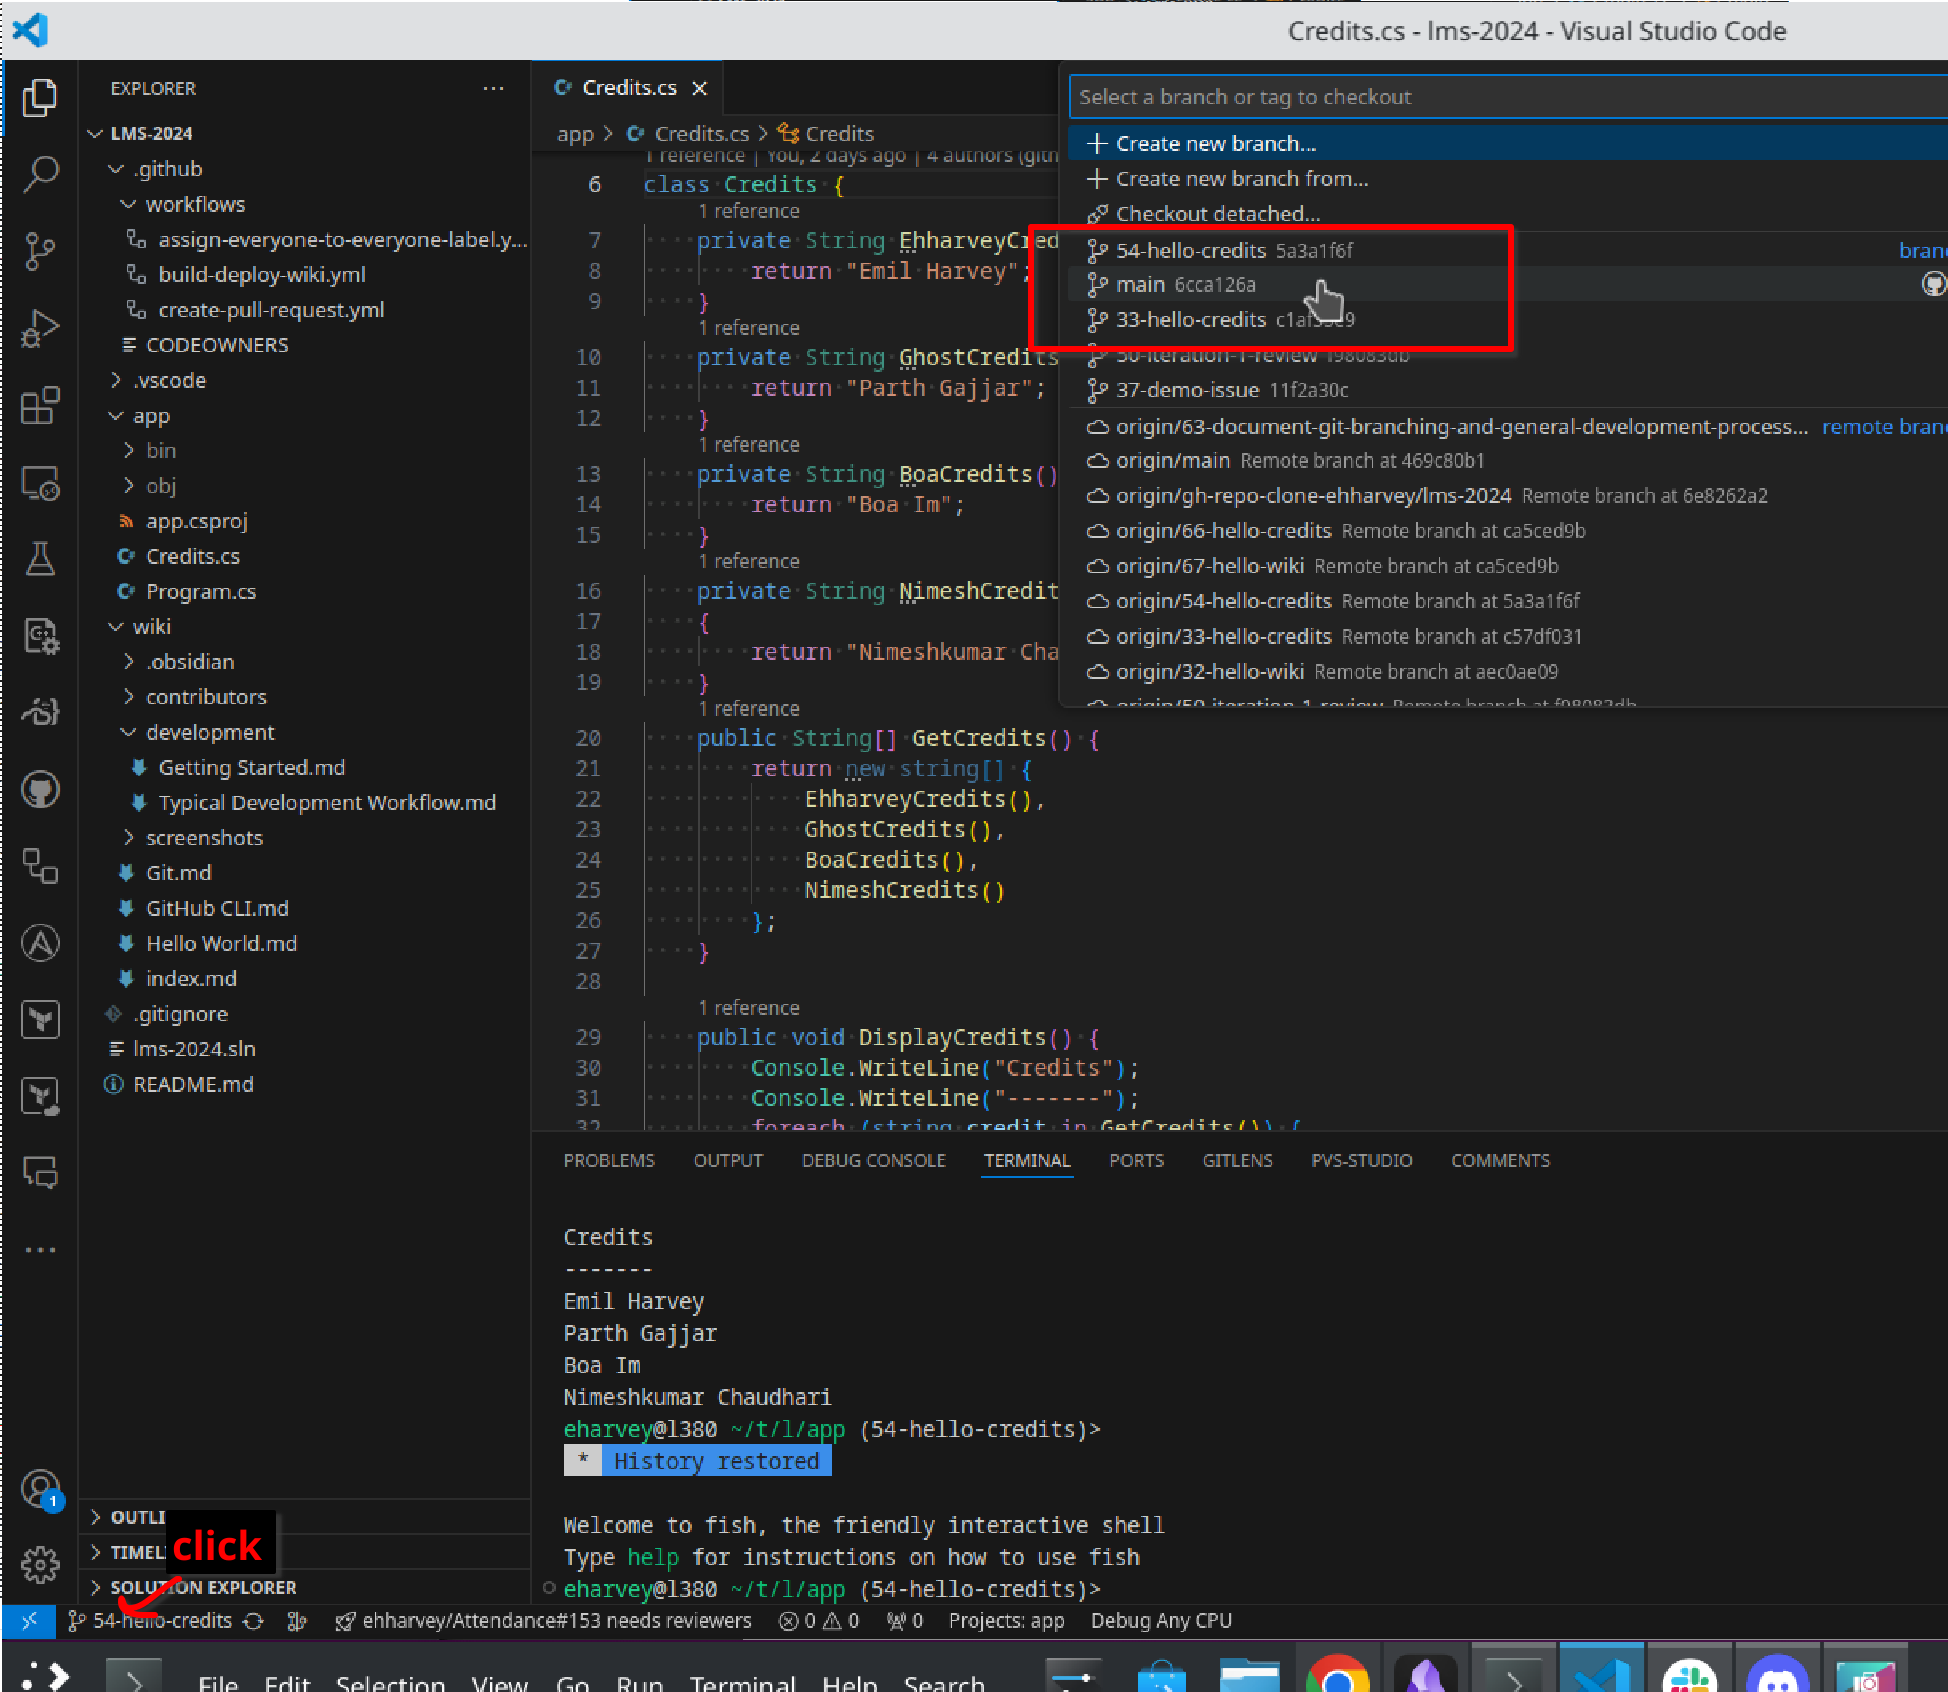
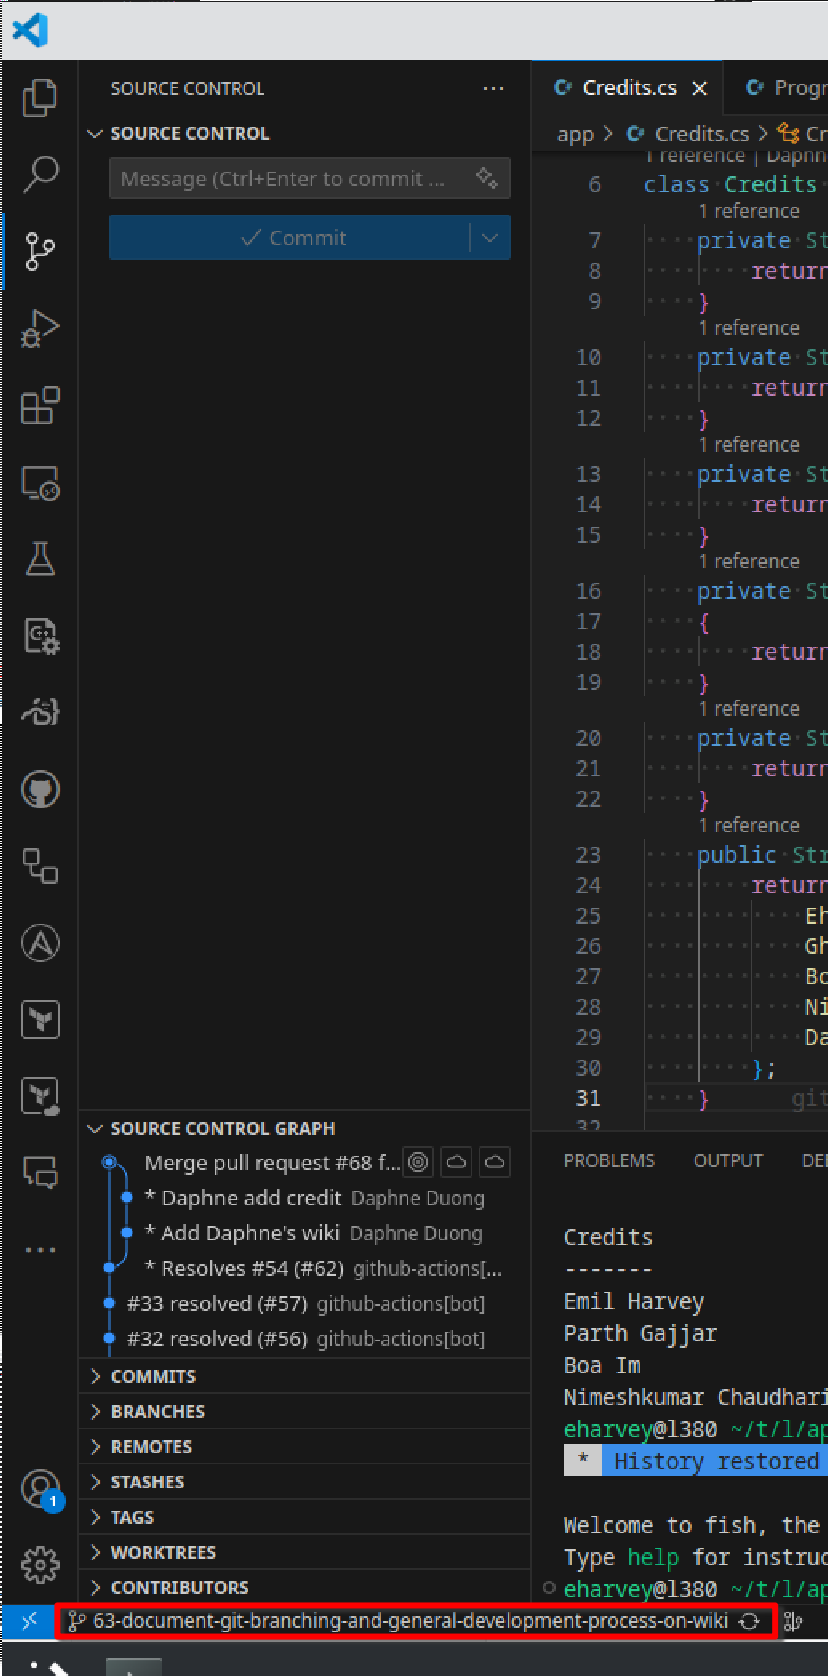
- After making sure your branch is up to date (you should see no number next to the
 tab), you can switch branches by clicking the
 mainon the bottom left again and choosing the branch that GitHub created for us!- For reference, in this example GitHub created a branch called 63-document-git-branching-and-general-development-process-on-wiki
- So I can type in ‘63’ to search for this branch!
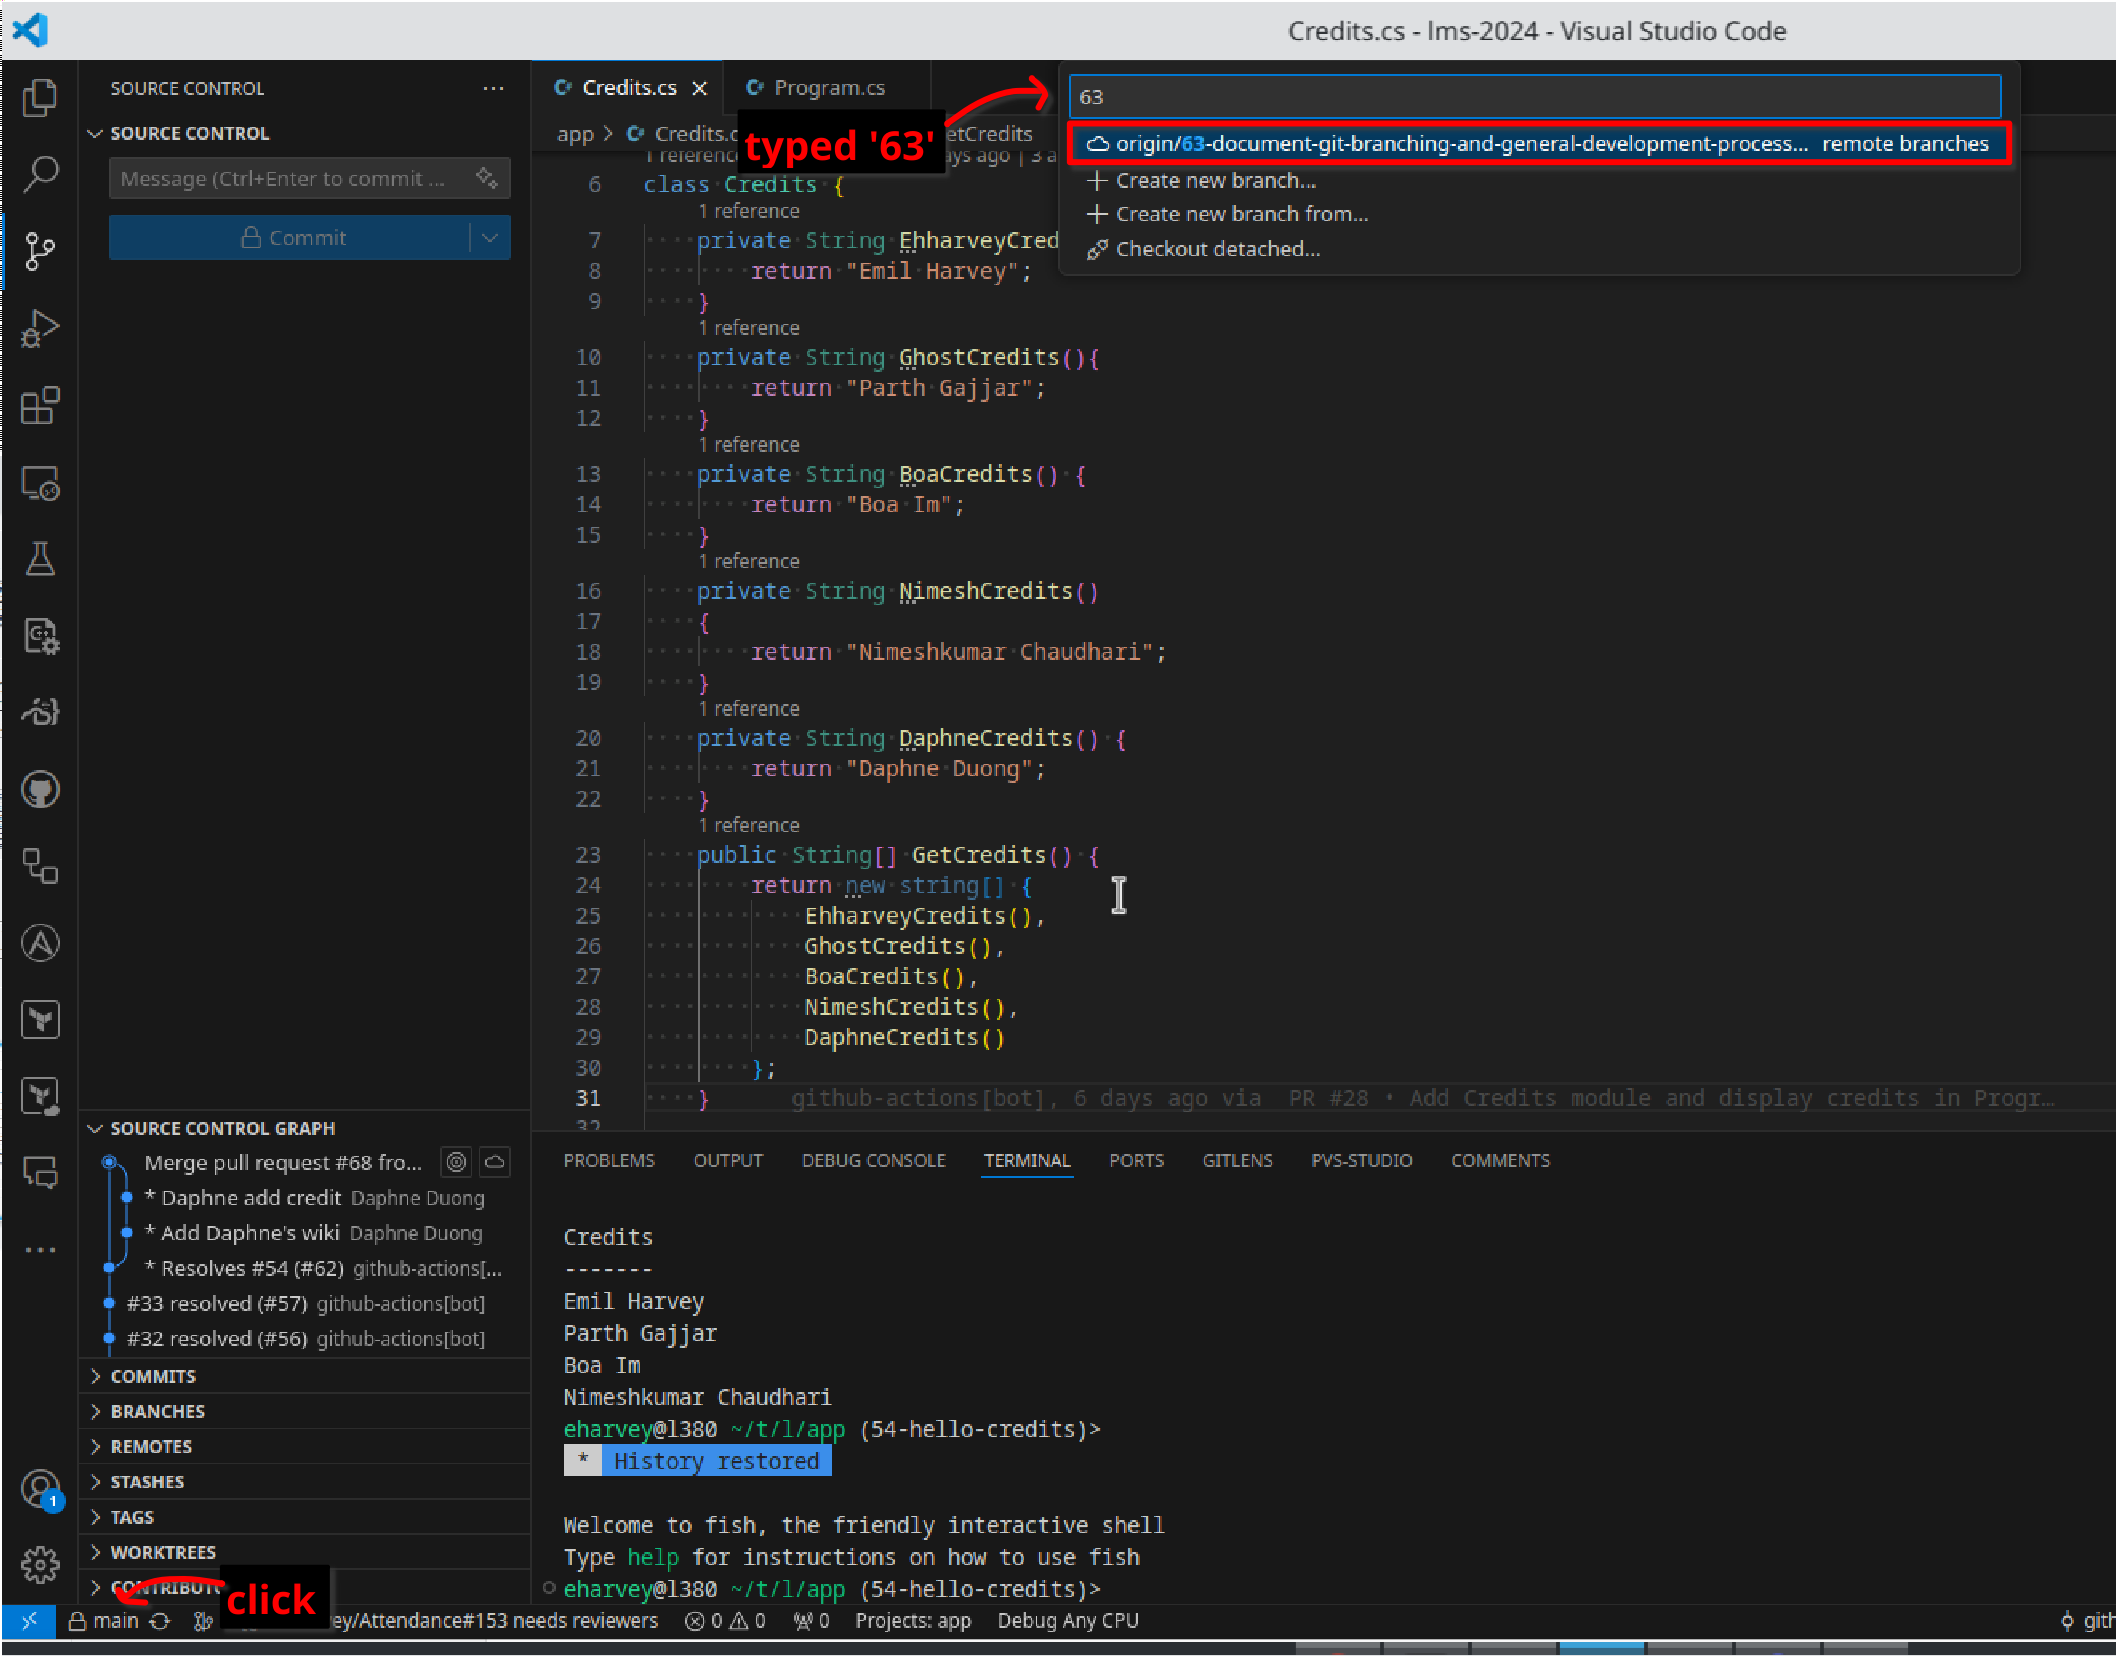
- It will start with
origin/: this means that it doesn’t exist on your computer yet but it does exist on GitHub. Makes sense! We created the branch on GitHub website.
- You’ll know you’re on the right branch when you see your branch on the bottom left
- You want to first make sure you are on the main branch
- Now you are ready to complete the work! Modify files, run the program, do the things!
- When you have finished making your changes, you will want to commit and push your changes
- First, go to the tab
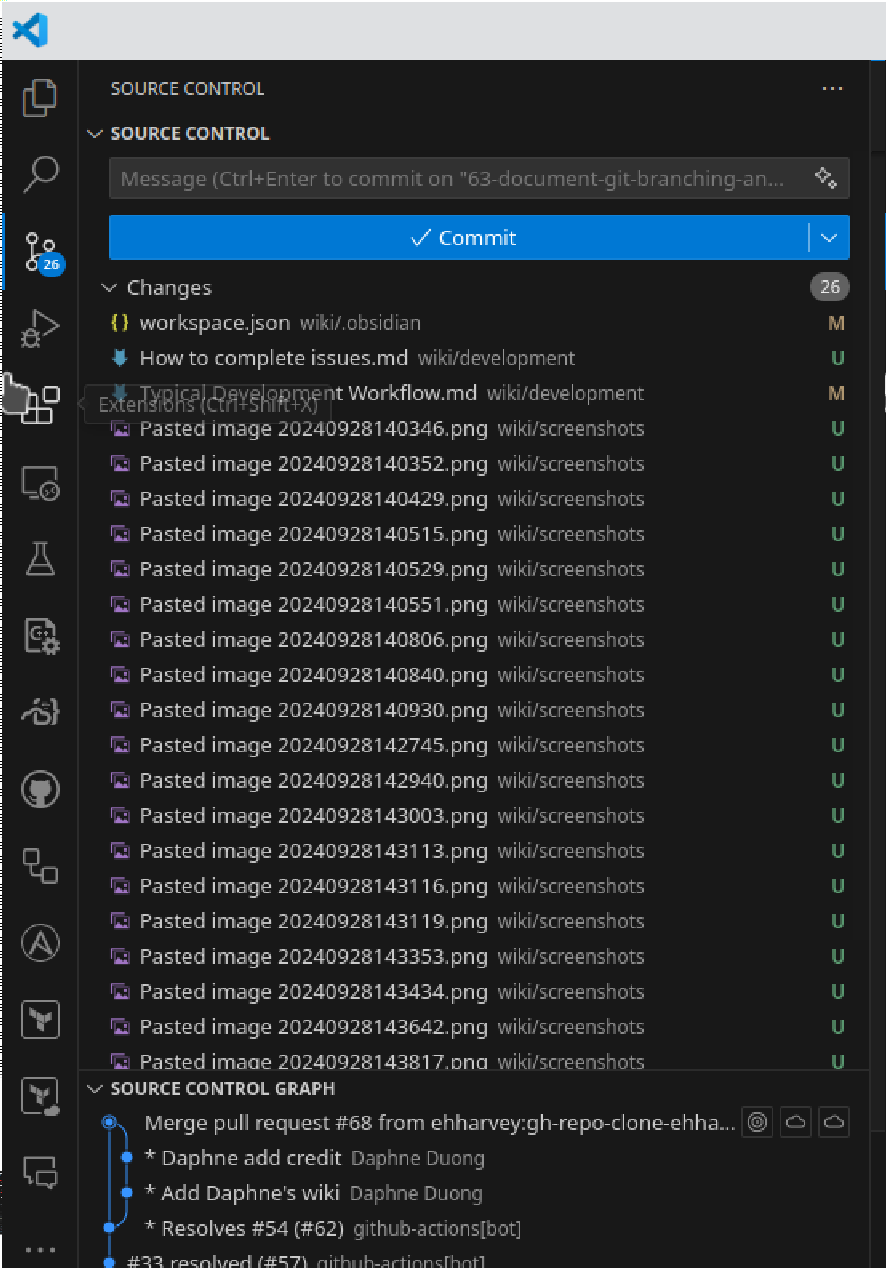
- Then, look at the changed files on the left-hand side. This is a good place to double check: the files listed here should be the ones you recognize as creating, deleting, or modifying
- You can commit all of these files or just a few.
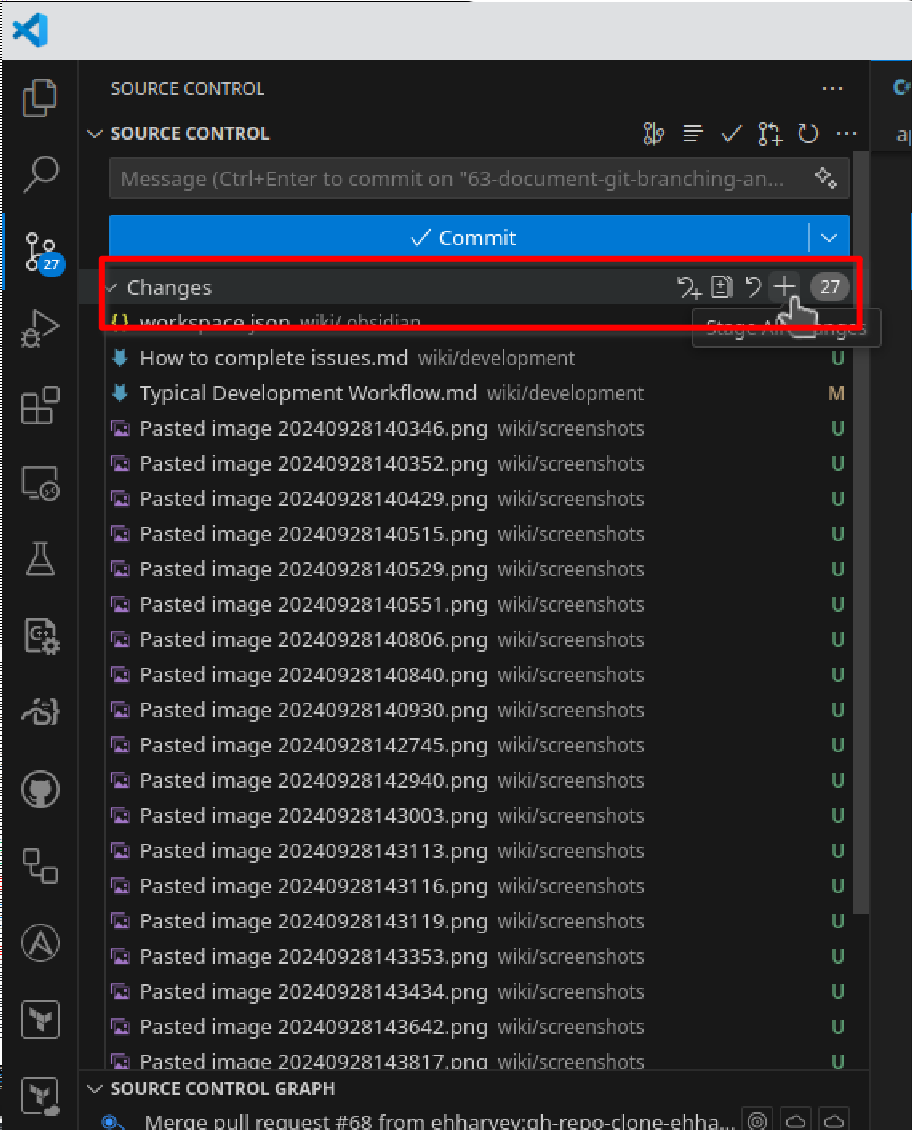
- To commit all easily, hover your mouse over
Changesand click the+symbol - To commit 1 or more files, hover your mouse over a file instead
- Next, write a commit message. I recommend writing the number of the issue you’re working on for that extra traceability. Or you can write a small 1-sentence summary of what you did. Notes:
- I like to write important “gotchas”. For example, maybe I commit but I discovered a big issue while working on the code. I might want to comment about that in the commit (but honestly I should also mention this in Slack)
- You can do bullet points by doing something like:
* bullet point 1
* bullet point 2
* bullet point 3
- Next, make a commit by clicking the commit button:

- Lastly, sync your changes with GitHub by clicking the Sync Changes button:

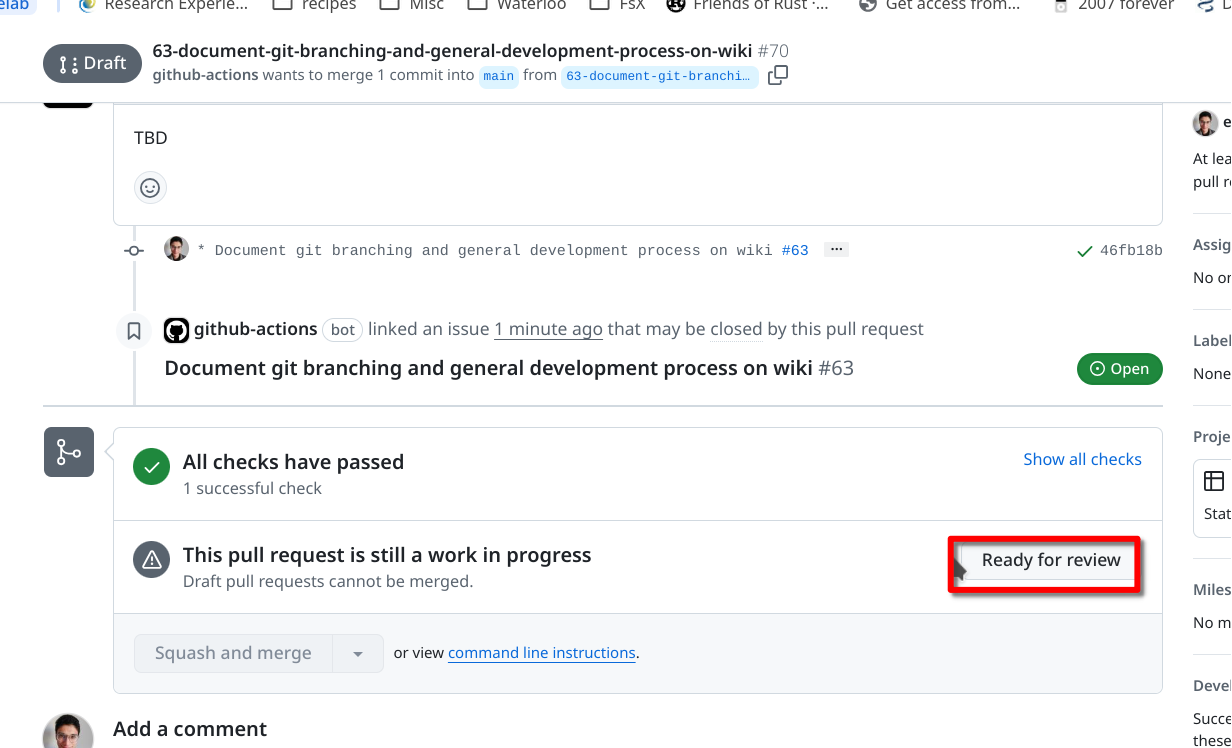
- Now you’re done! You can now go to GitHub.com and look at the Pull Request that our automation created for you!
- It’ll be listed as a draft.
- Feel free to modify the description, but this isn’t super important since it’ll already be tied to your Issue anyways :)
- If you’re happy and ready for Emil to look at it, scroll down and click “Ready for Review”
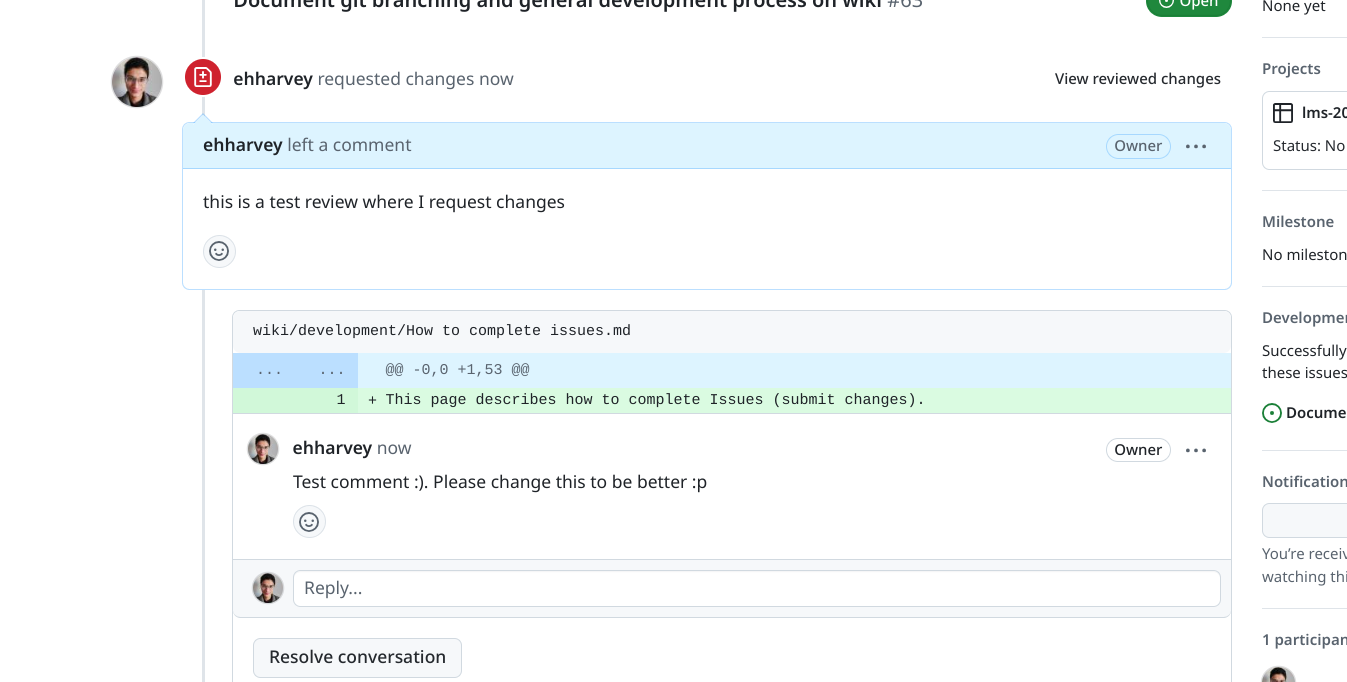
- Note that Emil might come back with some further work. Maybe you are missing some needed tests or documentation, etc, or Emil sees a bug. In this case, you’ll see an update to this Pull Request and will look something like:
- If you get this, you’ll want to switch back to this same branch and make additional commit(s) to address my feedback :)
- To commit all easily, hover your mouse over
- First, go to the